Welcome in this tutorial, here we are gonna learn how to color our comic books with Adobe Photoshop. In these first part we are going to prepare the line art for colors.
1-Preparing the line art
Once you got the art board with the pencil inked, you can start scanning the paper. After the scansion we have just to adjust the brightness and contrast of the line art in order to clean-up the art board. In fact also if the draw seems to be clean, it need a quick correction to prepare it for the color.
You have at list a couple of way to do that in photoshop:
Image/Adjustments/Brightness and Contrast. Move the two arrow until you get the right balance. You should get something like this.

2-Clean-up the line art
Click on Image/Adjustments/Levels [cmd+L], this brings up the level palette. Now you should drag the arrow on the right towards the middle until the grey noise of the pencil despairs.
Be careful to don't burn to much the line art.
In fact on this way some black line will be eaten. To solve
that now you should drag the left slider towards the middle.
Also in this case be careful to don't esagerate over do it, otherwise you will lose the integrity of the original line art.
At least you can use the eraser [E] or the brush [B] tool with the foreground color set to white to remove some isolated noise.
 |
| Levels adjustments [L] in action |
Your line art should looks like the image below. Clean, with high contrast and strong marked lines. Once cleaned up your art board we are ready to move on.
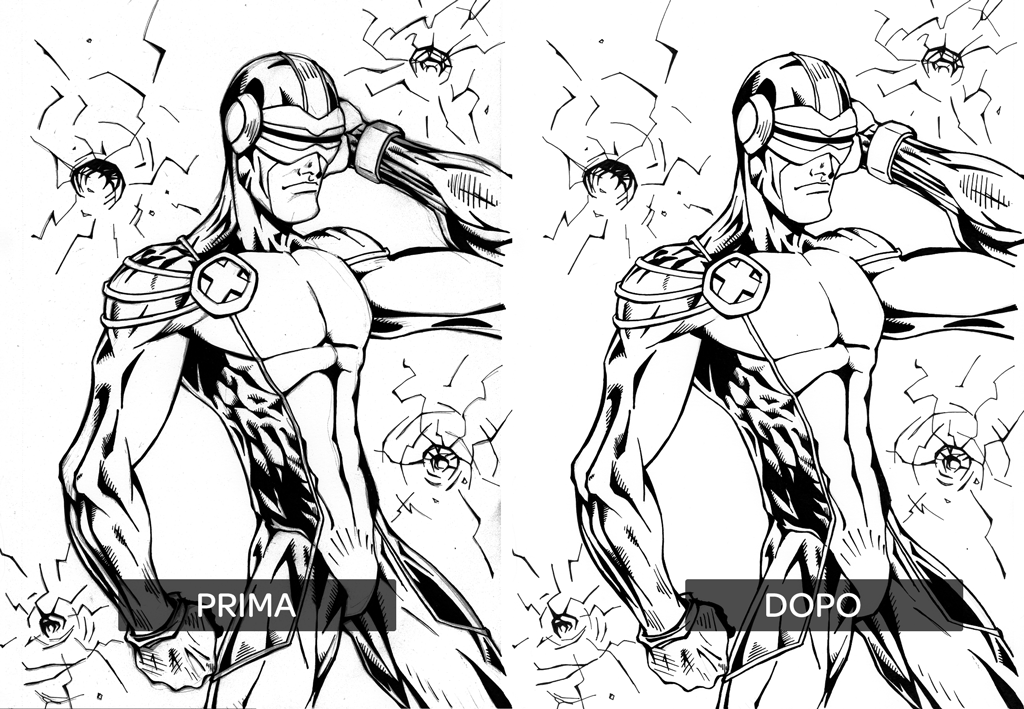 |
| Before and later Level adjustments |
3 - Set the alpha Channel for the Line Art
Now we go to the channel palette and create the alpha channel. Change the color swatch to black, and make the opacity 100% . Rename it "Line Art" so we can identify it easier wen we will have more channels. Press ok ang go haead.

Select the line art channel and fill it with white Alt+backspace. Your Line art channel should look something like this.

4 - Let's create the channel of art line
Keep pressed [cmd or ctrl] and click on the little thumbnail of one of the channels. You should see a selection around your line art. Press [cmd+Shift] to invert the selection. Now fill the selection with black color [cmd+backspace]

Now we have to remove the original line art from the RGB channels in order to have just one channel with the line art. To do that fill the RGB channel with white.

Let's take a look to our channel palette. It should looks like the image here. We have only the line art channel wit the line art. RGB channel must to be white for now.
Here you can fin the video with all steps.
http://www.youtube.com/watch?v=EntmoN6vGco
Great guys now we can jump to the next step of the tutorial.
No comments:
Post a Comment